
Modding a 2003-Era PC Case to fit a 140mm Water Cooler
By Arka
12 April 2021
Background
I'll start off with a bit of background on how I got this case and why I did this. I was given this case by my neighbor who was originally going to take his PC to a e-waste depository. The original PC was made by a now-defunct computer company, from around 2003, and powered by a Pentium 4. I gave this computer a temporary new life as a NAS server, as it possessed 2 SATA ports, but eventually the motherboard gave out. However, I still kept and liked the case, an unremarkable early-2000s beige box mid-tower with a sticker and badge from a dead company, complimented with a sharp steel interior which cuts your hands while working in it.
After the death of the Pentium 4 motherboard, I fitted the computer case with the motherboard and CPU salvaged from my Grandmother's old HP computer that I played minecraft on back in 2013, and then to a quad core i5 750 motherboard which my friend gave me, also having its backgrounds in minecraft, as he gave it to me to run a minecraft server.
6 months prior to writing this, my other friend had generously given me a water cooler, which fit my other spare motherboard/cpu combo, from my first ever PC build, an MSI-970A-G46 with an AMD FX-8120 CPU of the notorious Bulldozer architecture, the horrors of such architecture 13 year old me did not understand.
The Design
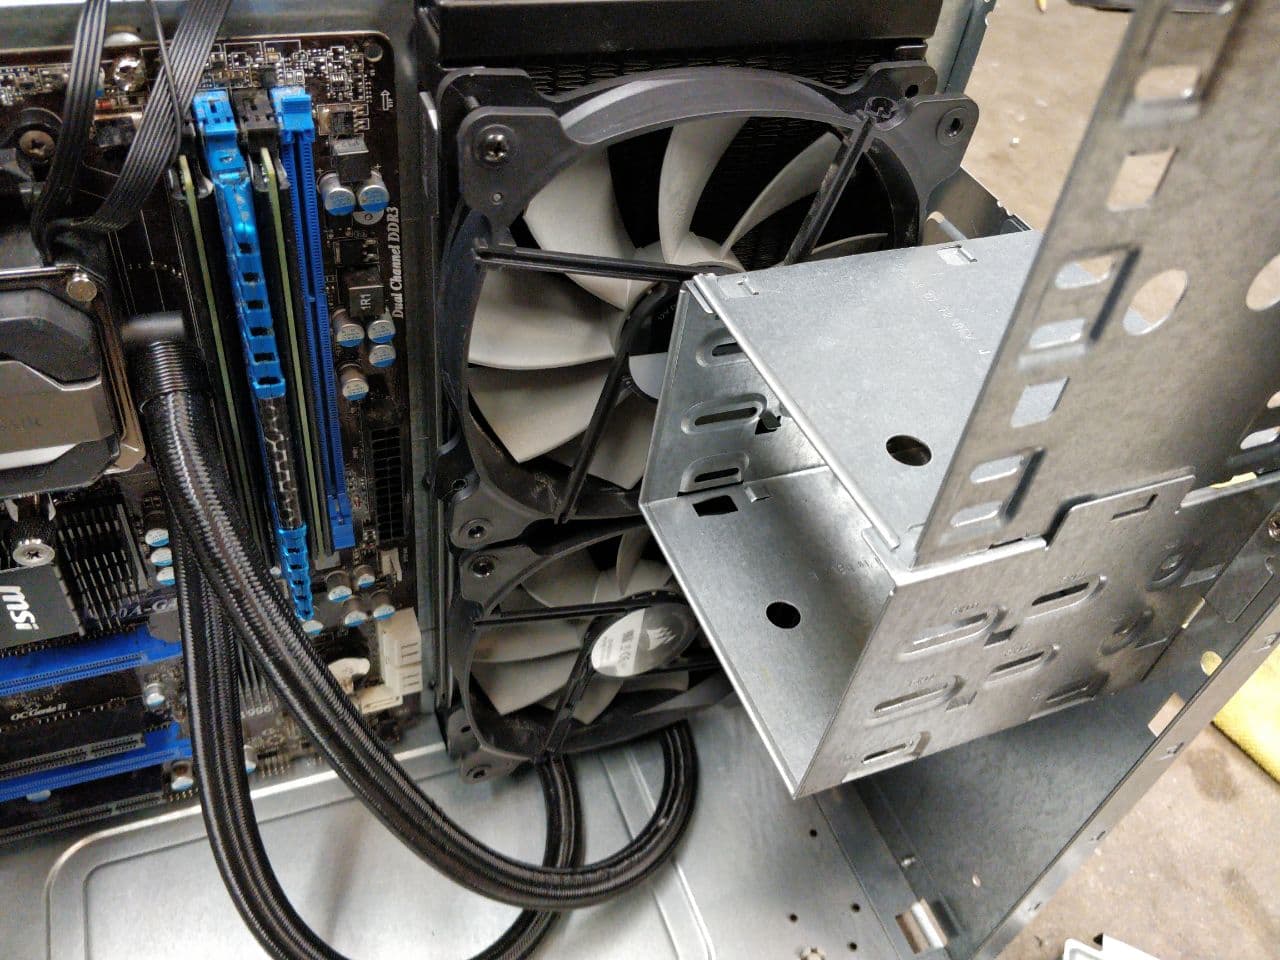
However it was still an upgrade as the chip was faster and ACCORDING TO AMD it had """eight cores""". Since the water cooler fit the CPU, I decided to go forward and put it in the case. However, the only space in the case where a radiator of this size could be put in appeared to be at the bottom. This wouldn't work, as not only were there was no vent holes, but even if i drilled them out, it would be sitting on carpet so the airflow would be negligable. After taking some rough measurements, It seemed to me that the best option would be to mount it vertically, between the back wall of the case and the drive bays, but this would require some modification.
On the side of the case, there were vent holes, which meant I would not need to modify the outside of the case, which I wanted to keep intact as much as possible. However, a portion of the back wall of the case needed to be removed, to allow air through as well as parts of the 5.25 drive bays to fit the radiator. This radiator was also an abnormally large 140mm one rather than 120mm. The rest of this story is the build log.
The Build
The first step was to dissassemble the case. Rivets were drilled out and the drive caddies, front cover, and an unnecessary piece (perhaps for holding a fan?) was removed. That piece would have blocked the radiator. I do not remember why I left the motherboard in for these pictures.


Since the case was dusty and old, after taking everything out. I sprayed it down with a hose and gave it a good cleaning. After drying it off with a cloth, I allowed it to sit in the hot sun of the San Fernando Valley for 20 or so minutes, at which point it was almost too hot to touch. (Of course I took the motherboard out, I just forgot to take an image!)

Next, holes were marked and drilled in the side of the case to hold the radiator. The radiator was then test-mounted to the side of the case.


Parts of the back side of the case where airflow would be required were marked and then cut with a dremel. On the reccomendation of my Twitter mutuals I went to the hardware store to get a different cutting bit, and then cut the rest of the area. (First picture is with the old tip, second with the new.)


After the side of the case was cut and filed, the radiator was re-mounted along with the drive bay.

A portion of the drive 5.25 drive bay was cut off. Now there is only usable 1 drive bay, but atleast the radiator fits. I could still put a beige cover on it if i wanted to though.

After this, the case was reassembled, as was the computer itself

Conclusion
way too much writeup just for a little case mod but I felt like doing it.